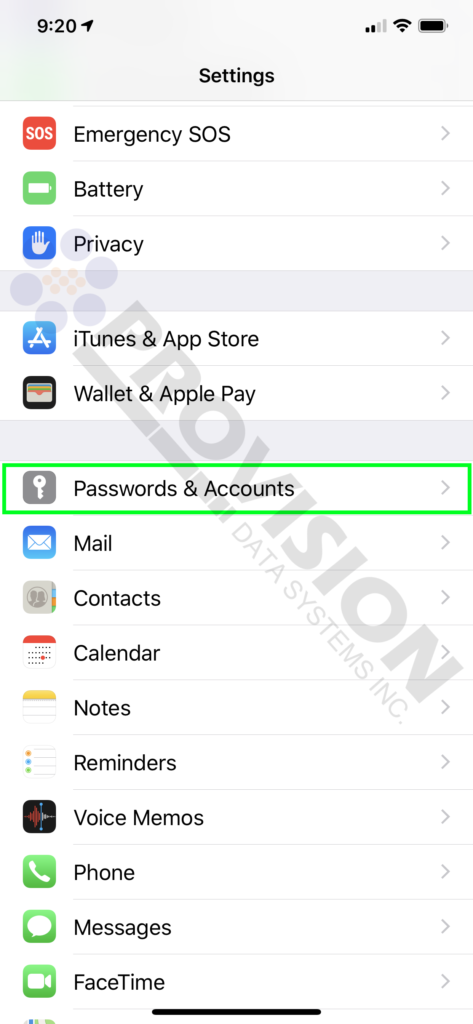
- Open the Settings app.

- Scroll to Passwords & Accounts and open.
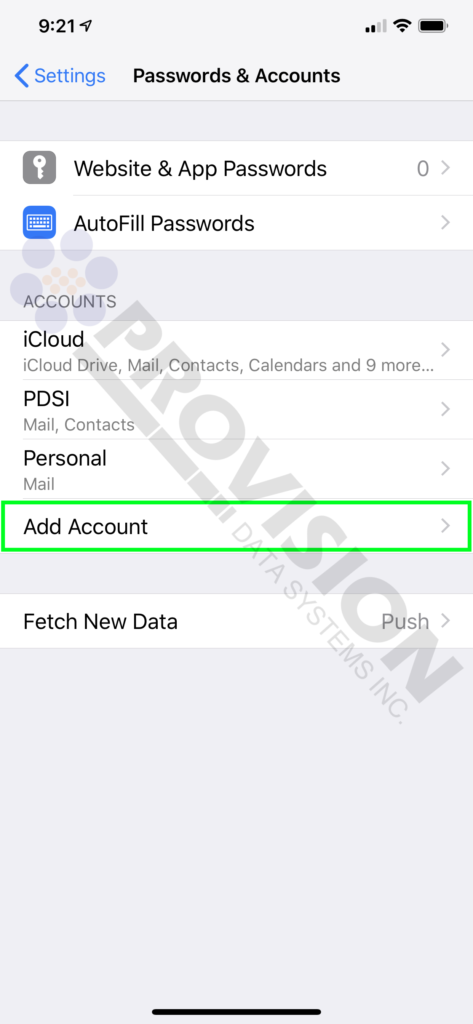
- Tap Add Account
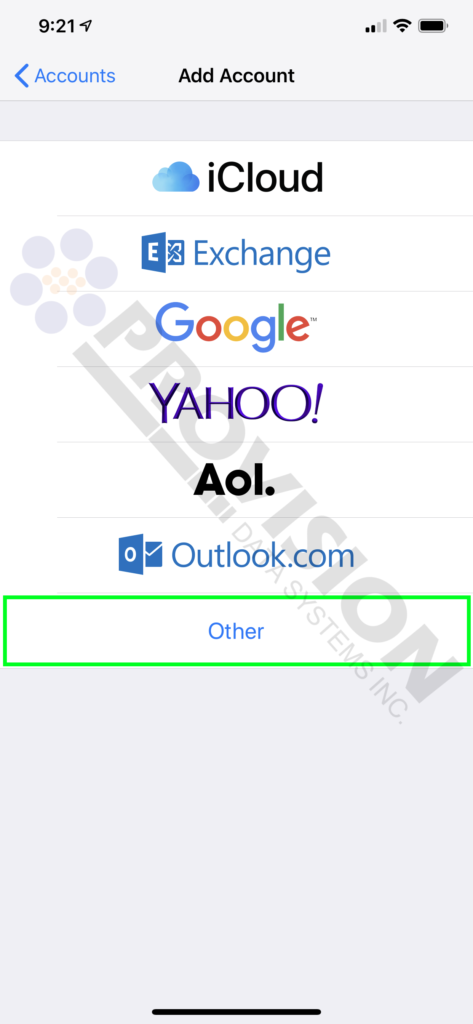
- Scroll down to Other and open.
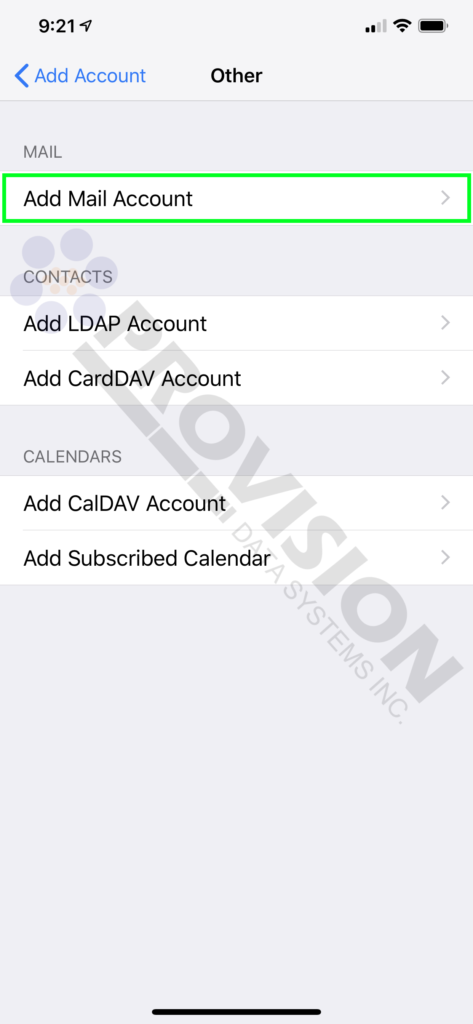
- Tap Add Mail Account.
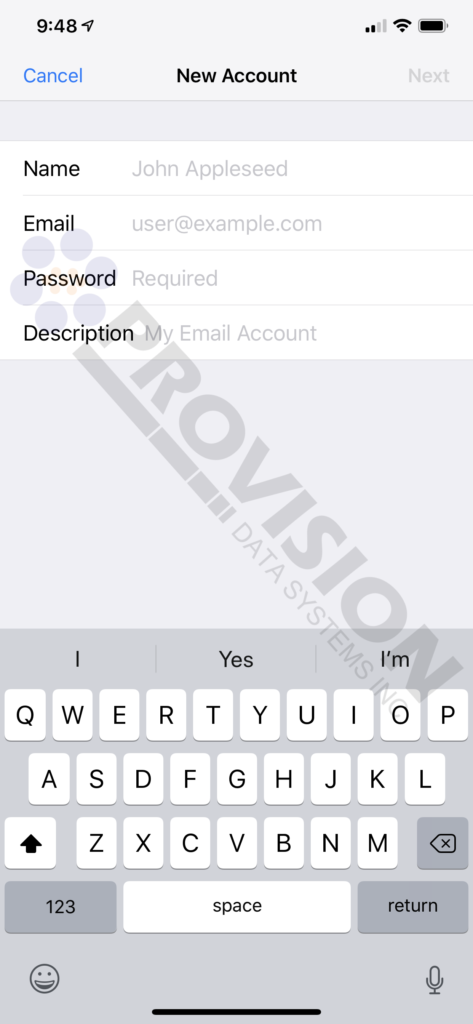
- Fill in Name, Email, Password and optionally Description, then tap Next:
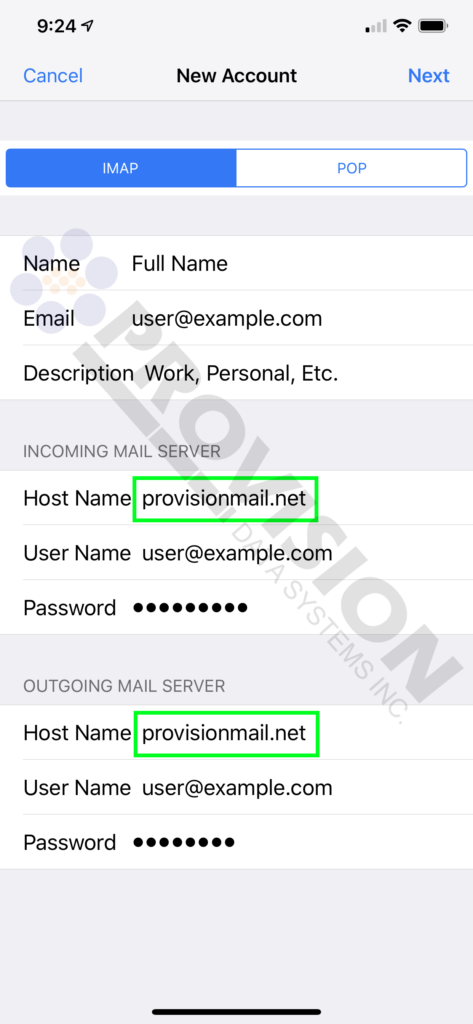
- Ensure IMAP is selected. Under Incoming Mail Server fill in Host Name, User Name (your full email address) and Password. Do the same for Outgoing Mail Server, then tap Next.
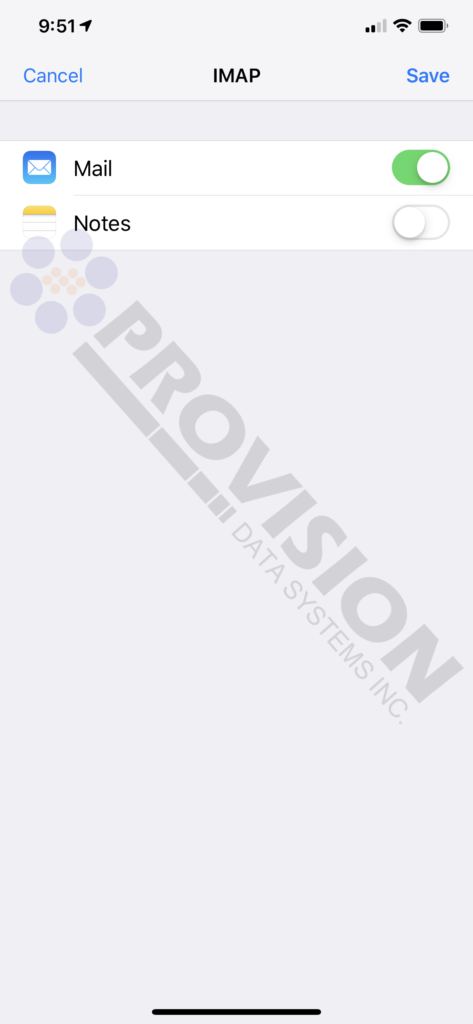
- Tap Save:
Your new email account is now active. If you have any email in that account it will appear in the email app within a minute or two.
The following steps are Optional. If you use the ProvisionMail Webmail you will want to have the Sent and Trash folders on your iPhone correctly synchronized with the Sent Items and Deleted Items folders in webmail.
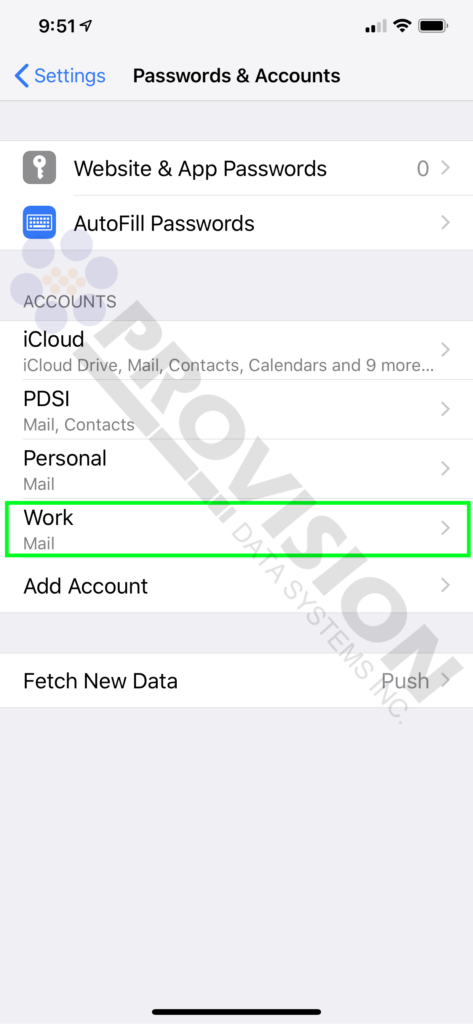
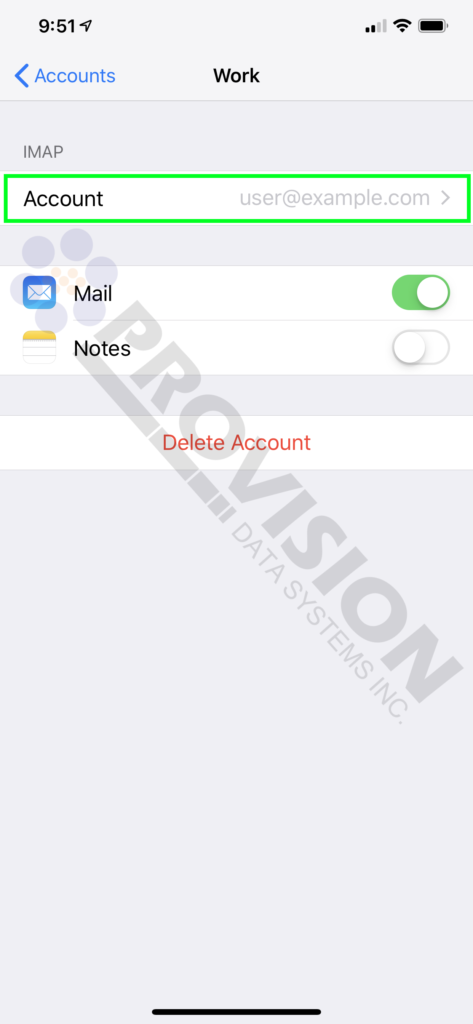
- Choose the account you just created:
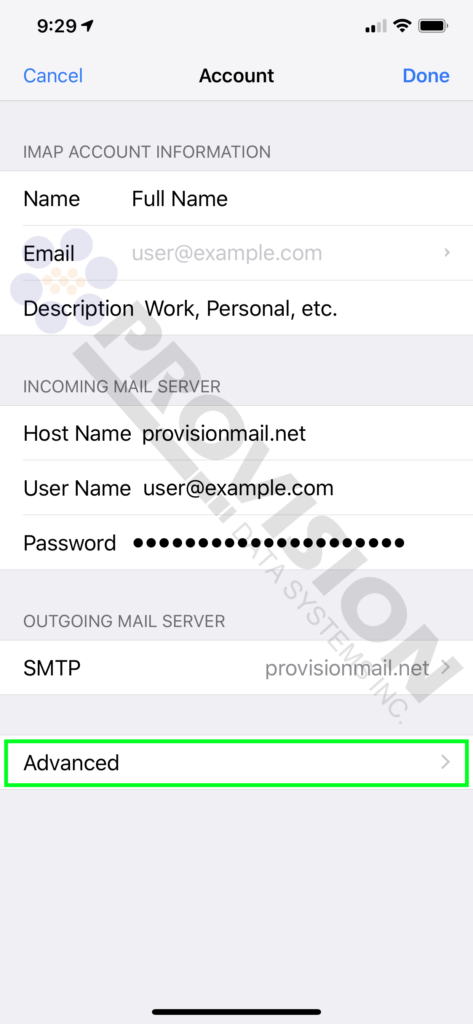
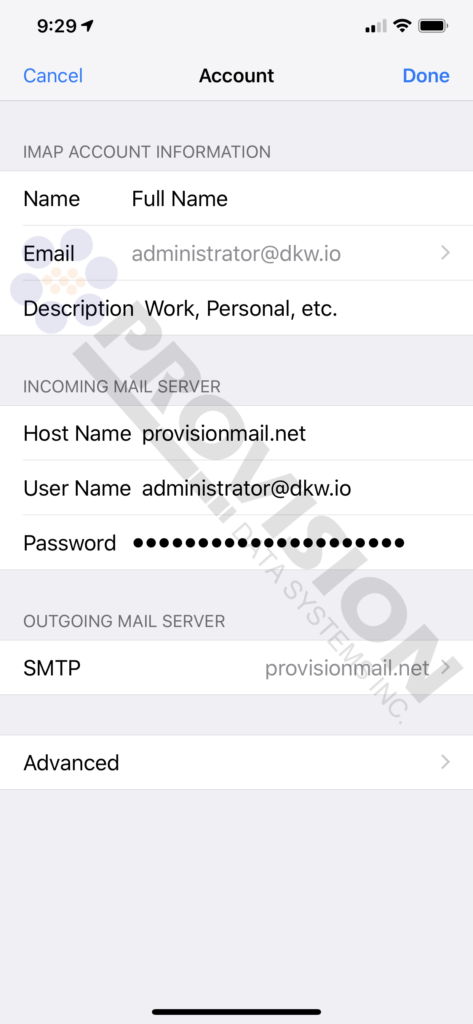
- Tap Account:
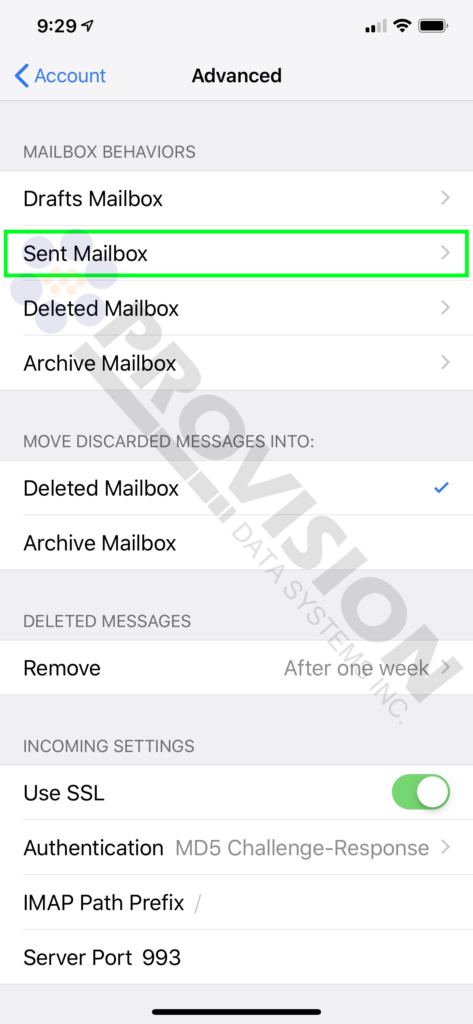
- Tap Advanced:
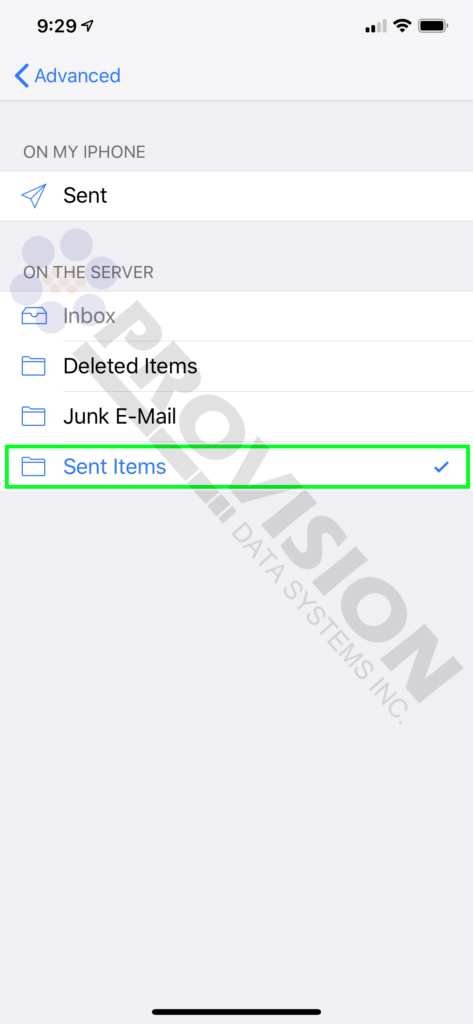
- Tap Sent Mailbox:
- Select Sent Items and then go back to Advanced:
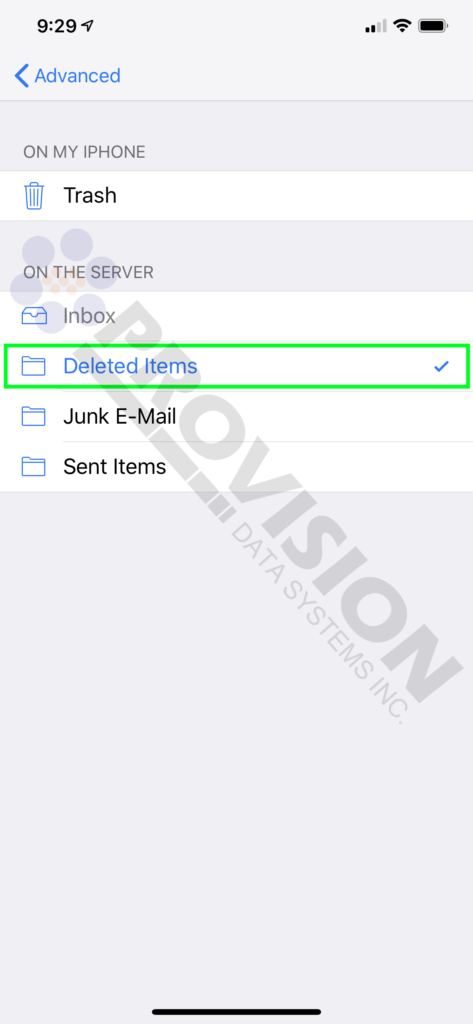
- Tap Deleted Mailbox:
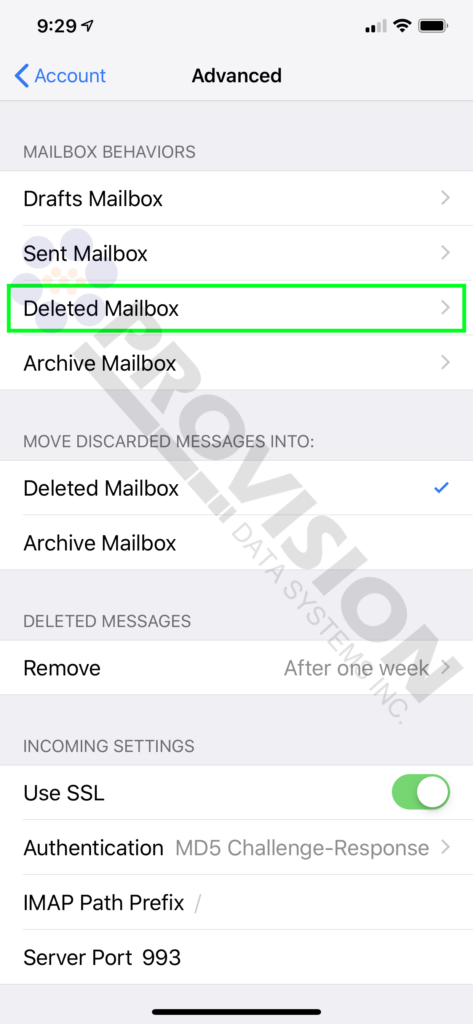
- Select Deleted Items and then go back to Advanced:
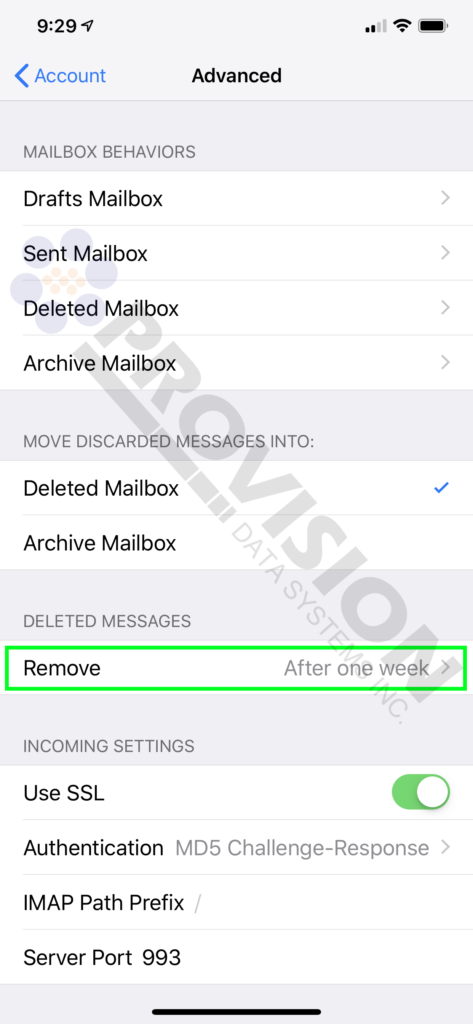
- Optionally, review the Deleted Messages Remove setting to ensure it is set to a value that works for you. Then go back to Account:
- Tap Done.
If you consistently see one of the following error messages the steps below may help with resolving them.
“The IMAP server **** is not responding”
“The account may not be able to send and receive messages”
- Open the Settings app.
- Scroll to Passwords & Accounts and open it.
- Under Accounts tap the account that is encountering the problem.
- Tap the displayed email address
- Scroll down to Outgoing Mail Server and Tap SMTP
- Tap the listing for Primary Server which should be provisionmail.net
- Verify that Username is your full email address
- Verify that Password is set
- Verify Use SSL is turned ON
- Verify Authentication is set to MD5 Challenge-Response
- Verify Server Port is set to 587
- Tap Done
- Go back one level by tapping < Account.
- Tap Advanced and scroll down to Incoming Settings
- Verify that Use SSL is turned ON
- Verify that Authentication is set to MD5 Challenge-Response
- Verify that IMAP Path Prefix is /
- Verify that Server Port is set to 993
- Tap < Account to go back the account settings
- Tap the listing for Primary Server which should be provisionmail.net
- Tap Done
- Tap < Accounts
If you experience problems please verify that your connection to the server works by opening a Internet browser and typing https://provisionmail.net/ and verifying that you can login with the supplied credentials.