Our premium email service subscribers will be able to enjoy use of our shared and personal calendars. To get started with a new calendar follow the step by step instructions below.
New Calendar or Task List
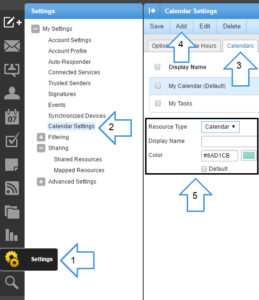 To begin, log in to your email account through the web interface at https://provisionmail.net
- Click Settings
- Expand My Settings to find Calendar Settings
- Change tabs to Calendars
- Click Add
- Enter the options you would like to use
- Click Save.
Your new Calendar or Task list should now be available to use through the relative menu items.
Share Personal Resources
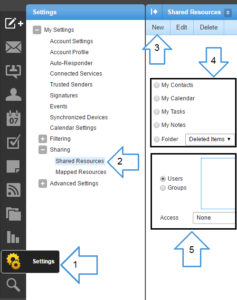 To begin, log in to your email account through the web interface at https://provisionmail.net
Please keep in mind that a shared resource must have an owner. If an account is deleted it’s shared resources are deleted too. An administrator can, however, create domain resources.
- Click Settings
- Expand My Settings then Sharing to find Shared Resources
- Select New to start the wizard to create a new share
- Select the resource you wish to share, then click Next
- Select the Users or Groups to share with, and those user’s access permissions
- Click Save.
The resource should now be available to the shared users.
Domain Resources
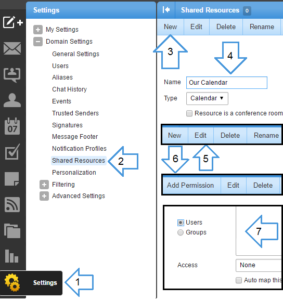 To begin, log in to your domain administration account through the web interface at https://provisionmail.net
- Click Settings
- Expand Domain Settings to find Shared Resources
- Select New to start the wizard
- Enter a name and resource type, then click Save
Using the conference room option will make the resource available to everyone. - Select and Edit the new resource
- Click Add Permission
- Select the Users or Groups to share with, and set the access permissions
Auto Map attaches the resource to all selected users. See Mapped Resources below - Click Save
The domain resource is now available.
Mapped Resources
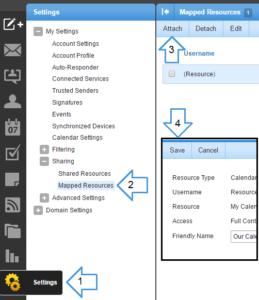 For a user to view a shared resource they must map it to their account. Auto mapping options are also available when setting permissions for a shared resource. To begin, log in to your email account through the web interface at https://provisionmail.net
- Click Settings
- Expand My Settings and Sharing to find Mapped Resources
- Select a shared resource and click attach
- Specify a name
- Click Save
The resource should now appear alongside the other items.
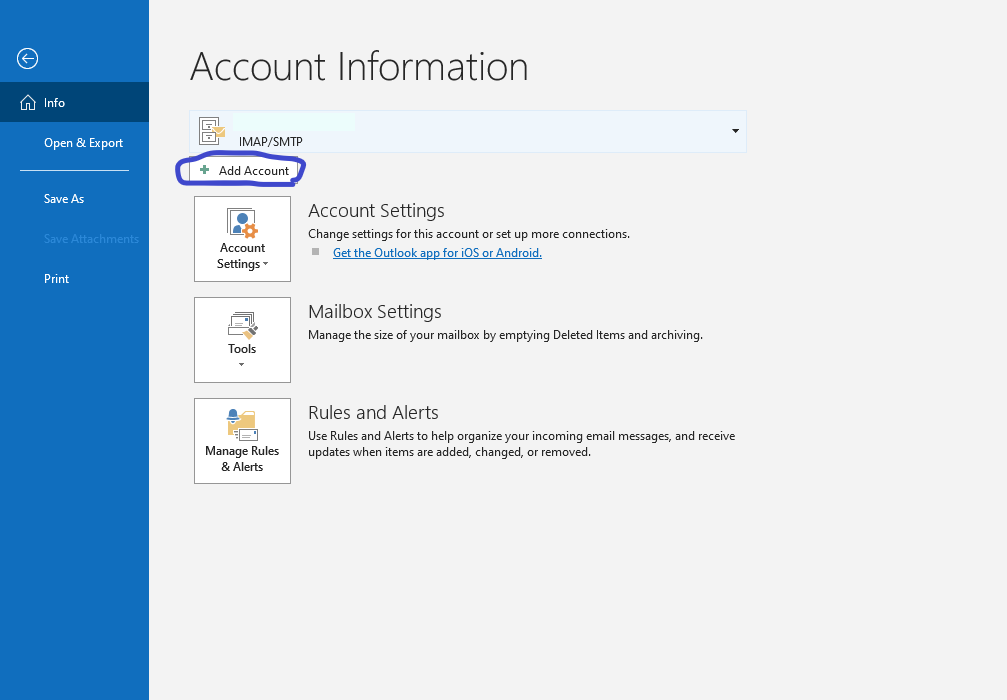
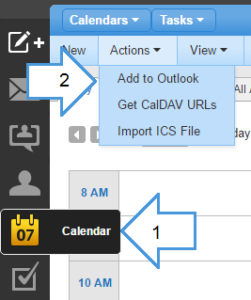
Add to Outlook
 To begin, log in to your email account through the web interface at https://provisionmail.net
- Click Calendar
- Click Actions and select Add to Outlook
- Follow on-screen instructions and click Save
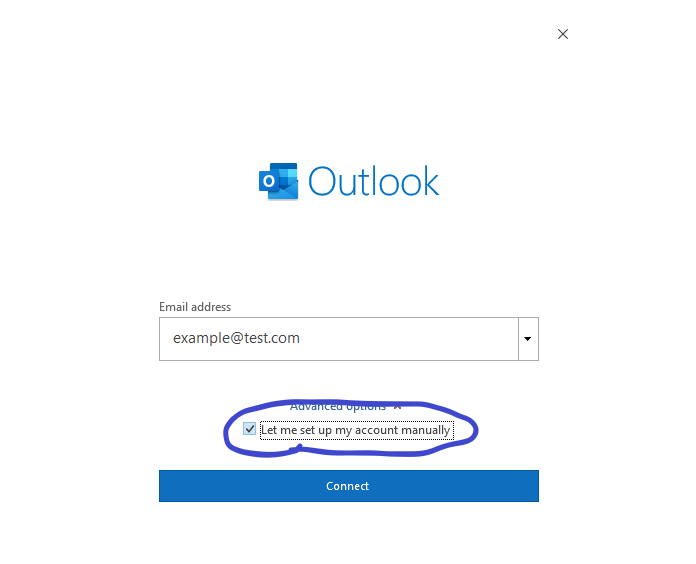
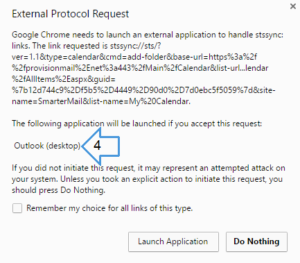
- You will see a request to open the application
The application opening the request should be listed
Click Launch Application - In Outlook a popup will ask you to confirm adding the calendar
Clicking Yes will allow Outlook to talk with SmarterMail.
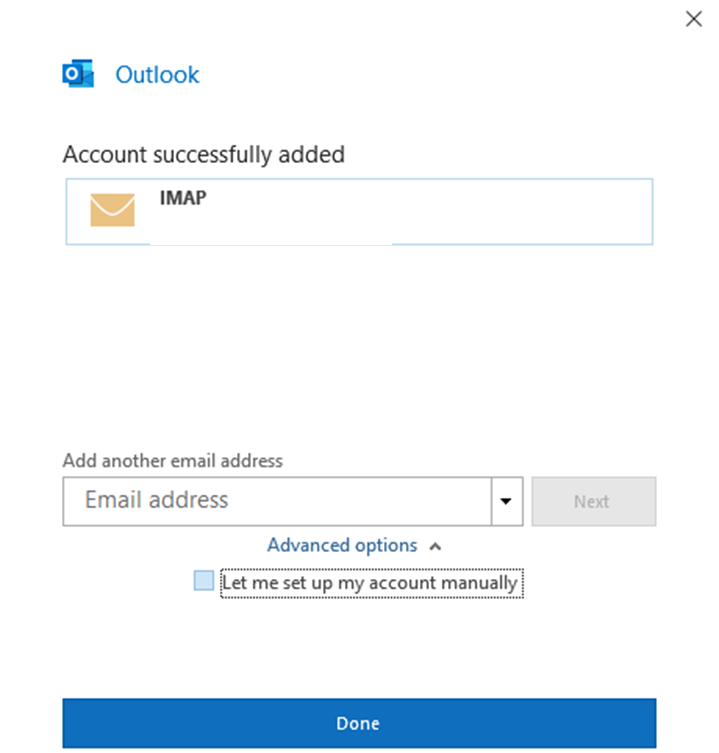
 The resource should be available to the Outlook Calendar.